"/> Verification: 6334419484400693

The Ultimate Starters Guide To Needle Felting

Nov 23 / Christie Lower
Are you starting your needle felting journey? Or thinking about starting? Or just needle clarification on a few things with needle felting? 
This guide is created to help you start and continue your felting journey with, hopefully, a little ease. 

But where do we start? Let's start with the absolute basics and if you already know the basics just keep scrolling. 
What is needle felting?

Needle felting is a technique that involves shaping and sculpting wool fibers using special barbed needles. The barbs on the needle catch the fibers and entangle them as you repeatedly stab the needle into the wool, creating a dense, interlocked structure. This process allows the wool to hold its shape, enabling the creation of three-dimensional figures, flat designs, or textures.
It sounds simple enough but if you have never done it, just those words can seem confusing and hard to wrap your mind around. 

So, if that's the case for you what I recommend is just to try it. After poking the wool for just a minute your mind will begin to grasp the potential of needle felting.

The supplies you need to get started are fairly simple and in general inexpensive.

When buying wool and needles quality is very important.
When I started I got an cheap kit off of Amazon. I loved it from the get go, luckily, but the moment I tried quality wool and needles my obsession grew intensely.  That being said let's start with the best places to buy wool and needles. There are lots of places and depending on where you are at will determine the best places. Below is a link to my article on places to buy needle felting supplies around the globe:

https://rusticfiberacademy.com/blog/wheretobuyneedle-feltingsupplies


Buying needles and wool is your first step and it can feel a little overwhelming. 
I do apologize because this is going to get intense. I am going to give you a lot of information but remember this there are only a few key things you need to get started. They are:


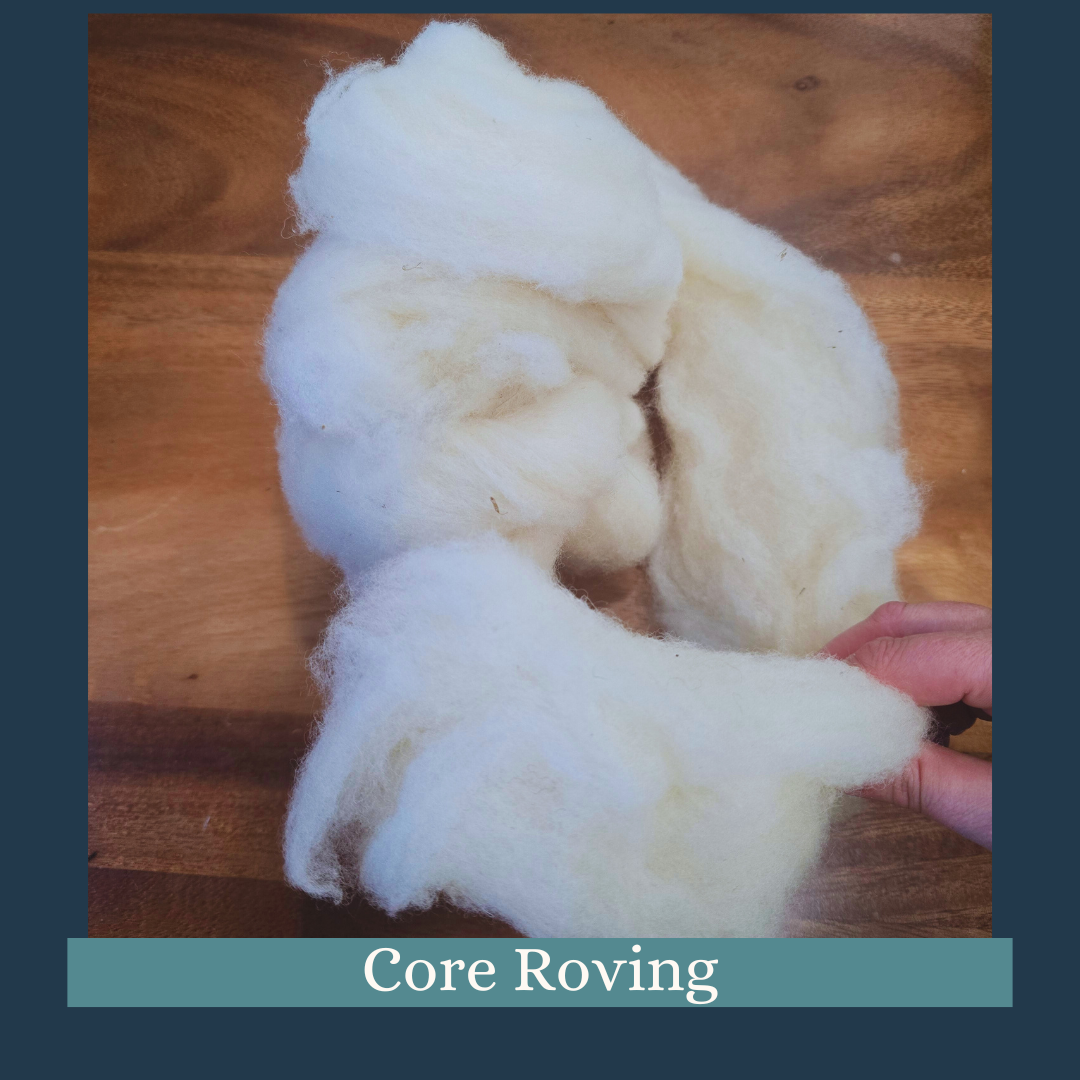
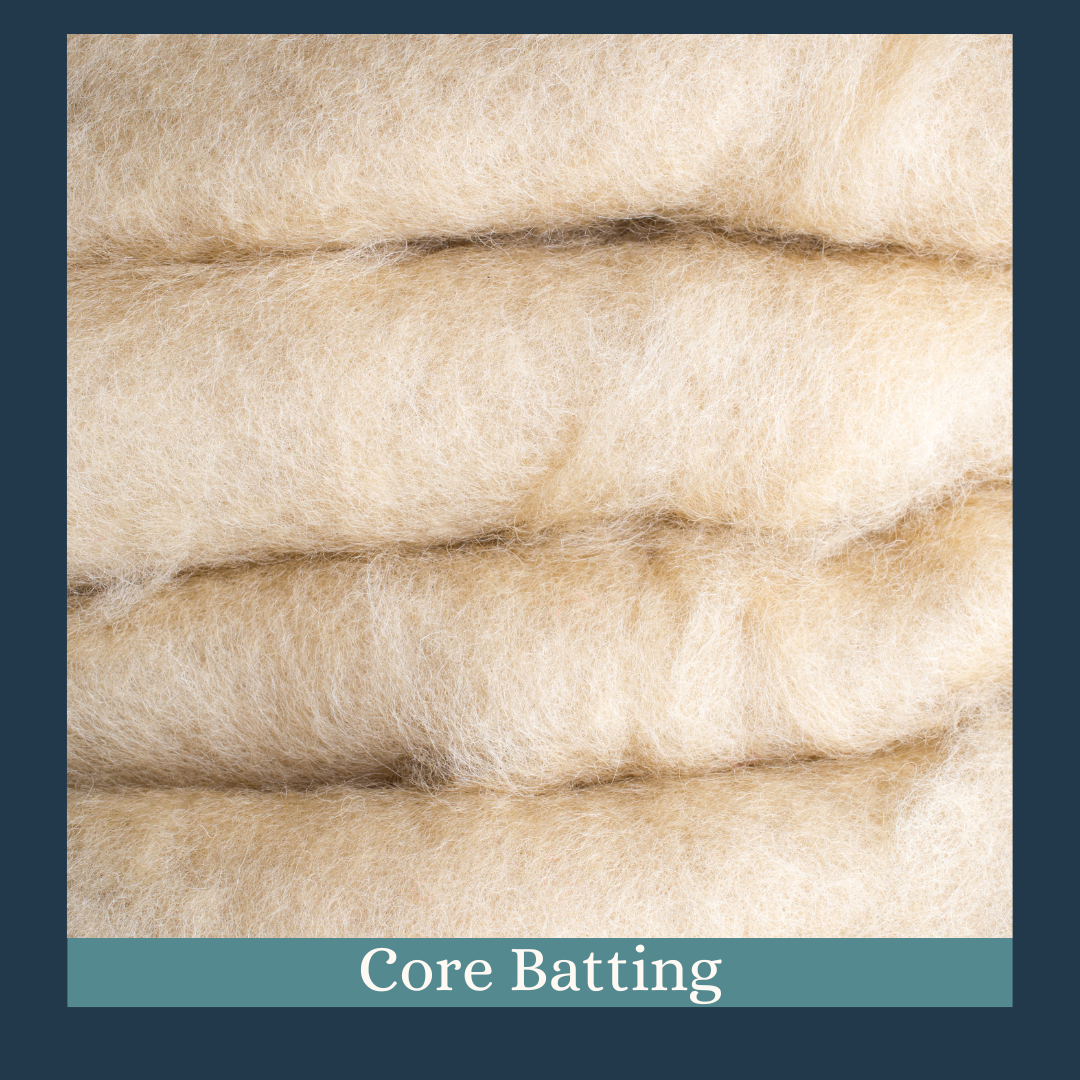
- a good core wool. This is used as the base to your felted piece. It can come in a variety of colors. A core wool is fibers that are interlocked. It can come as roving or batting. Roving is a long tube shape that comes in a ball. It is handy for wrapping. It also comes in batting which is like one big sheet of the wool. My favorite place to buy core wool is from Grey Fox Felting.
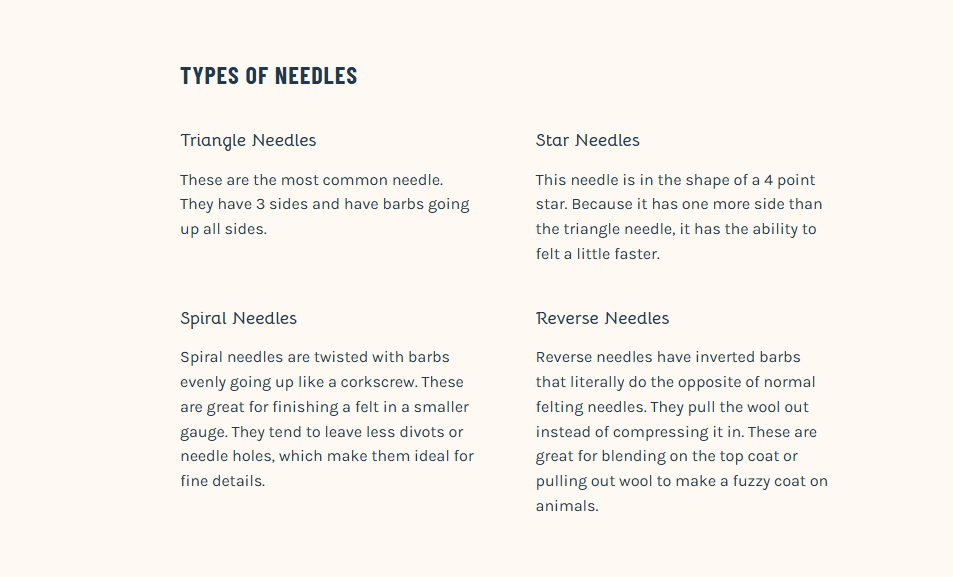
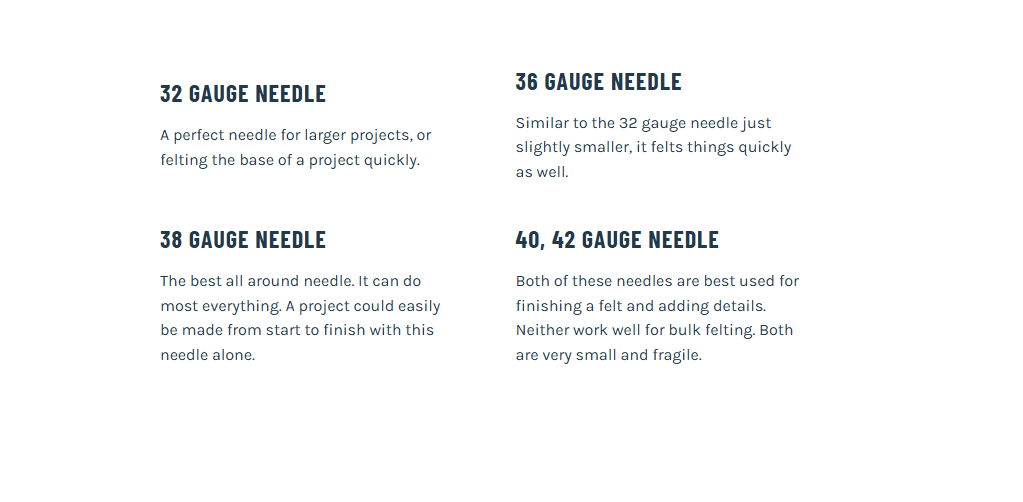
- Felting needles. There tons of options with felting needles. From star, spiral, triangle, twist, and multiple gauges. Don't get in a tizzy over this. Especially if you are starting out. I recommend going with a 38 gauge needle (this is your basic, get the job done, size) and any variety of spiral, twist, triangle, etc of this size will do. It'll be hard to notice the difference until you start doing a lot of felting. 

Now what does all of this mean? 

Let me break it down:

There are even more needle varieties then this. One of my favorite places to buy needles is Heidi Feathers and she has a detailed list of all the needles and what they can do here:

https://www.heidifeathers.com/guide_to_felting_needles.html

- a felting surface
. When you needle felt it is important to have something to work off of. This protects you and the needle. Needles have a tendency to break and if you are felting on a hard surface it is more likely to break. Also there are times you need a surface to felt against, this is when you are created something flat. During these moments it is very important to have a good felting surface.

Now a felting surface can be many different things. For my students I use a small foam surface from www.livingfelt.com. For myself I use one that is made from compressed wool. Mine is from Erin at Grey Fox Felting. You can use a pillow but this won't work well for any flat felting that needs to be done. Some use hemp bags filled with rice, I even know someone who found a garden kneeling pad worked well.

With these three things you can start needle felting so many things. 
With just some core wool, a felting a needle and a felting surface you can start. 

Now to get started needle felting:

The first thing I tell my students is to just felt the wool. This is the best thing to do to get the feel for the wool. Take you hands and fold a small section of the wool a few times and start poking it on your felting surface with your needle. 

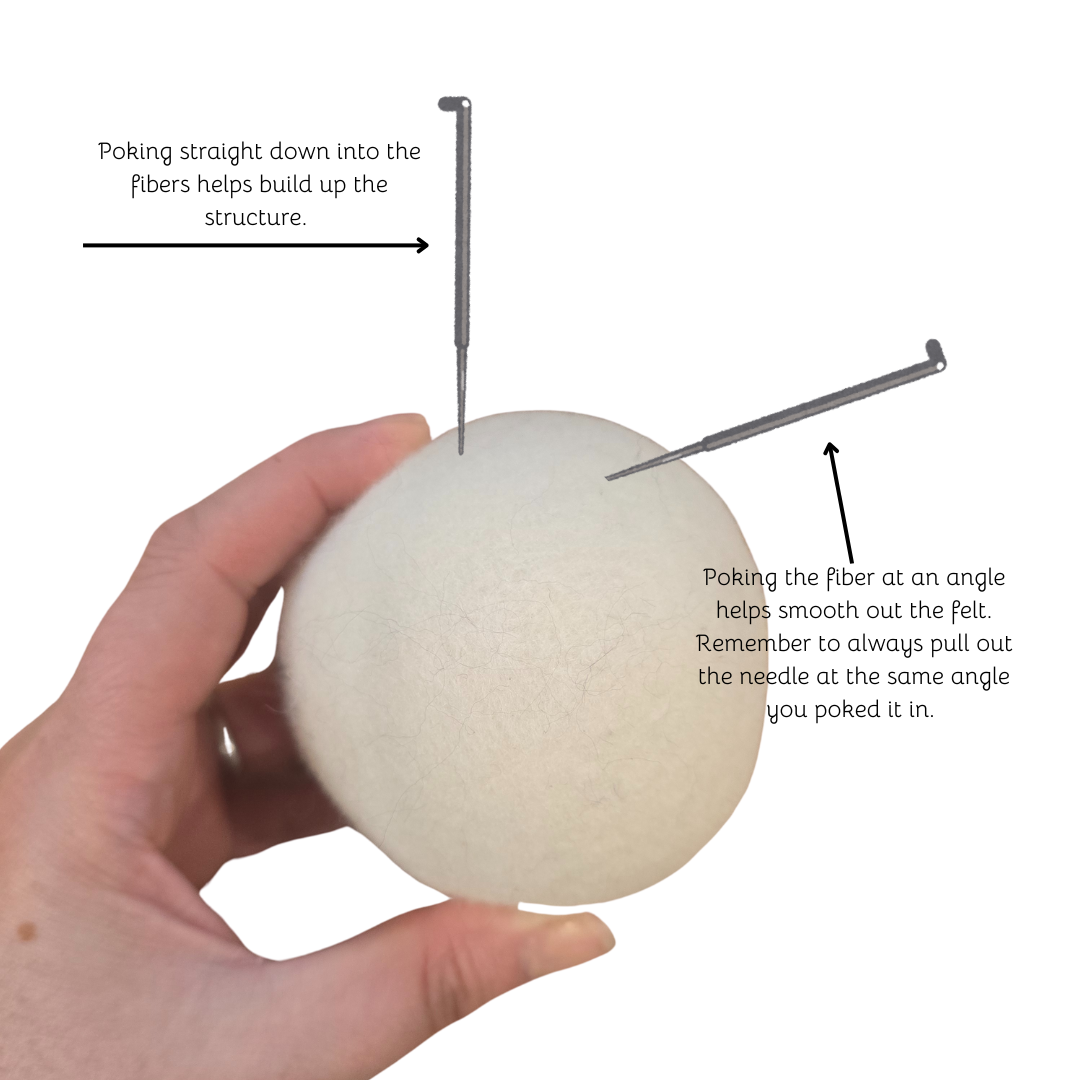
Don't felt hard. The barbs on your needle only go up a little ways. A softer poke is better a hard poke. Poking hard is just hurting you and not doing much to the wool. 

Check out the image below on how to angle your needle depending on the effect you want.
Once you are comfortable with your needle and feel ready. Its time to start creating.
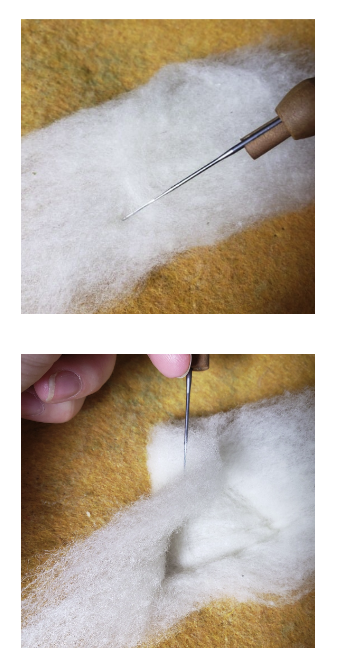
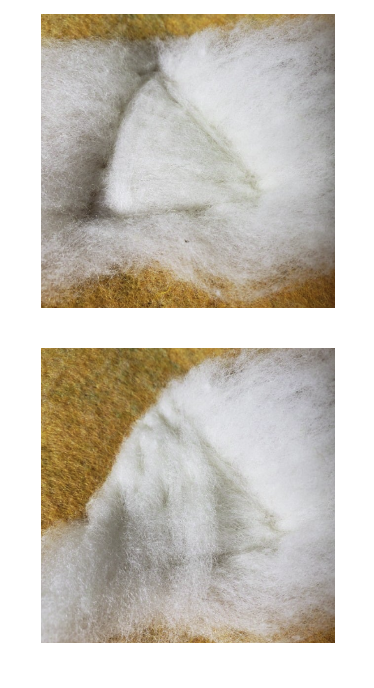
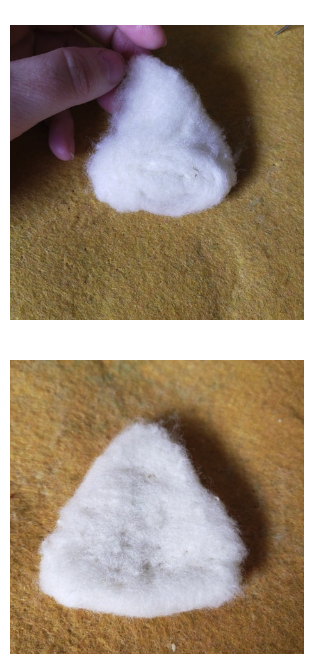
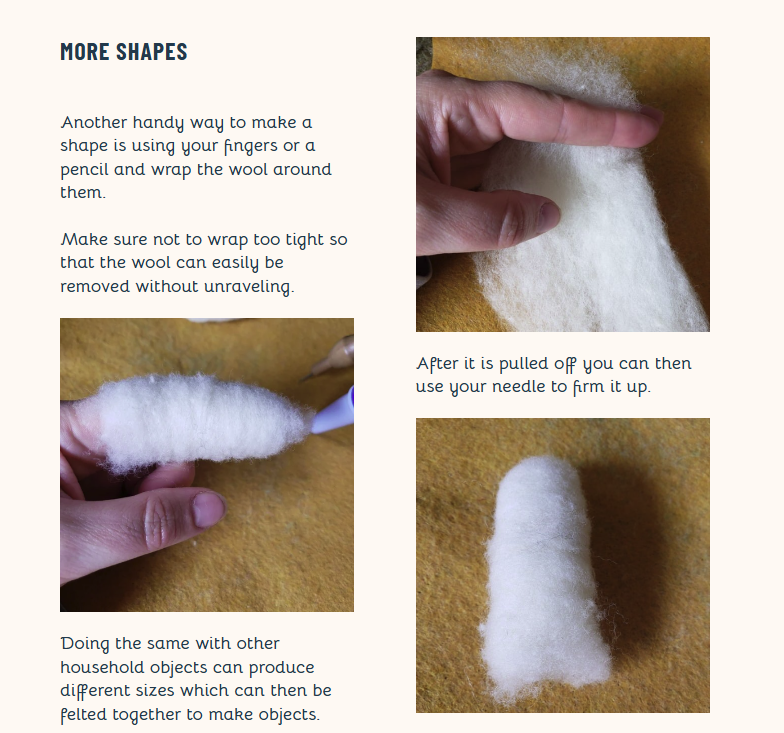
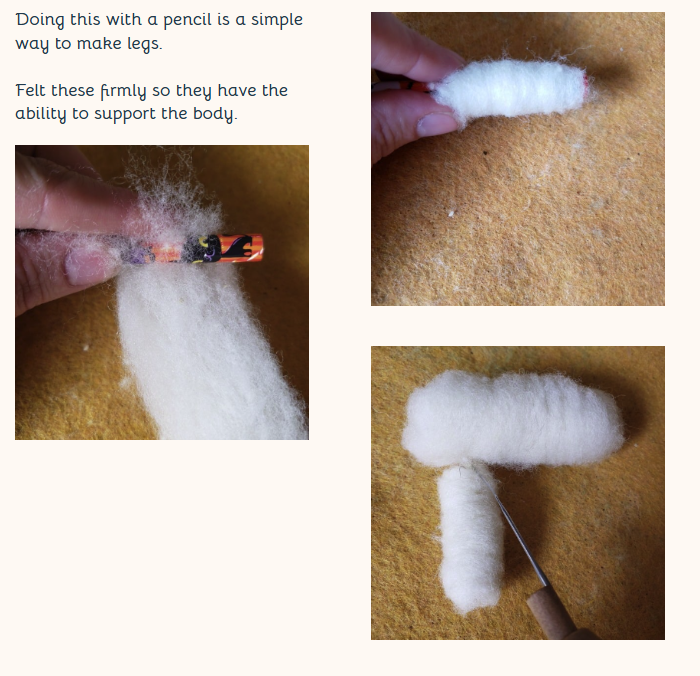
A key to needle felting is knowing how to make simple shapes. Once you know how to make different shapes, you can learn how to put those shapes together to create almost anything. 

Follow along with these simple tutorials:
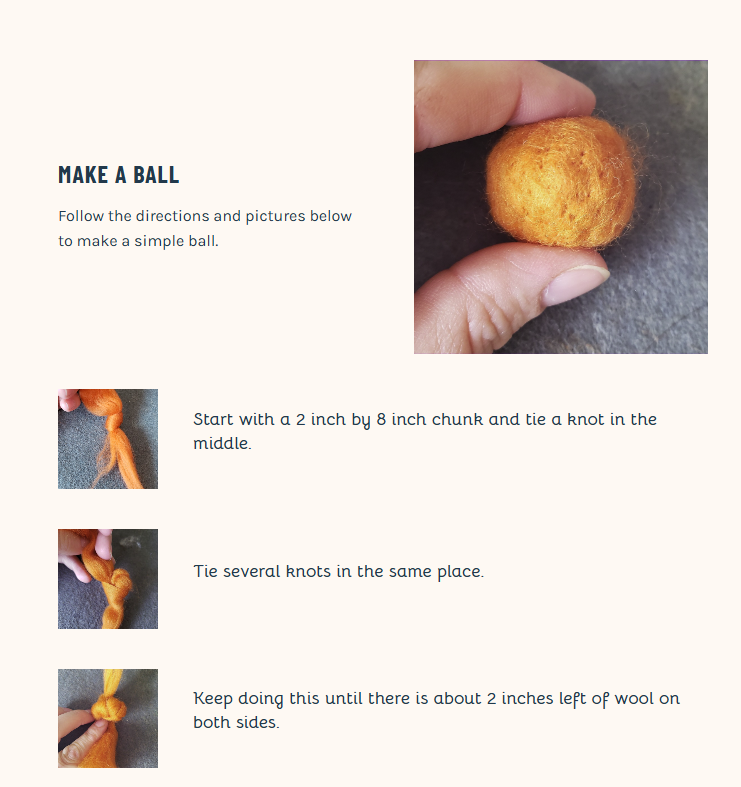
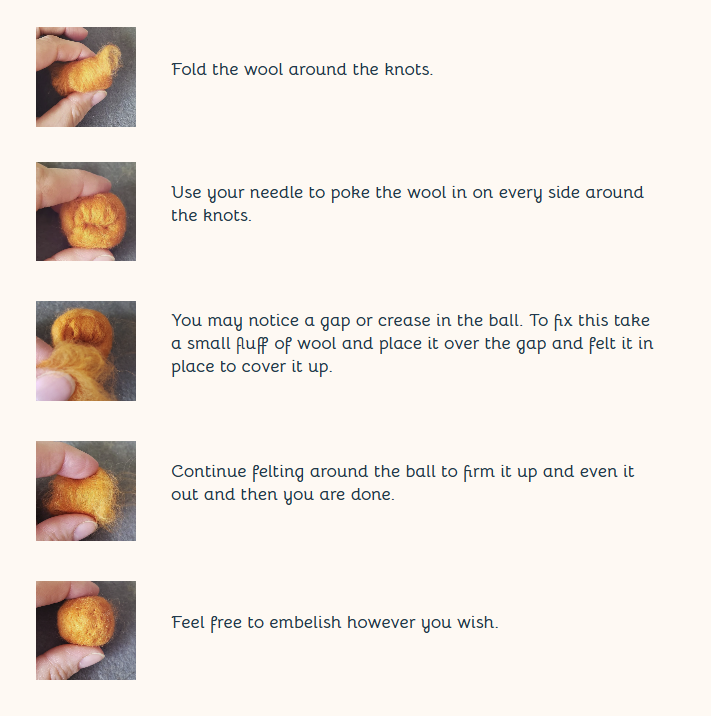
Another simple shape to learn to create is a ball. Follow along to see how I make one:
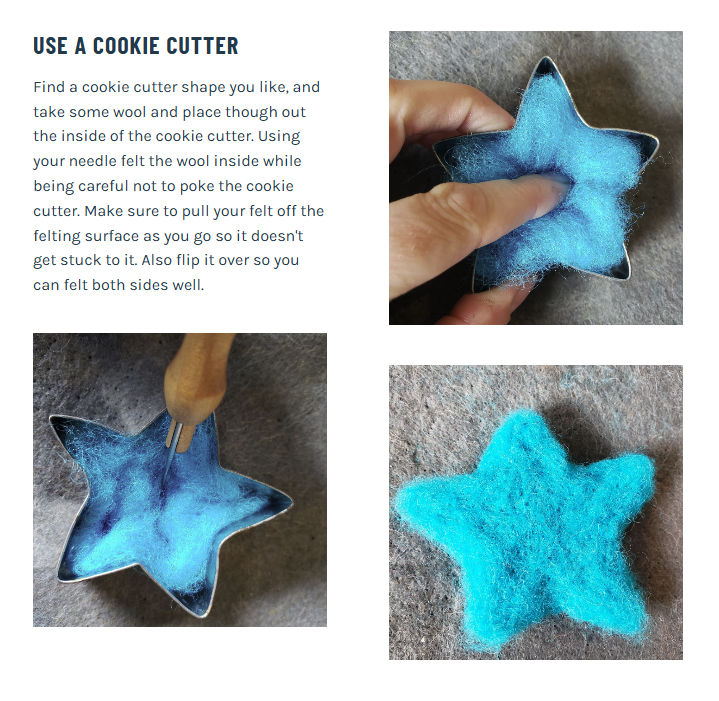
A great first project will have you going through your kitchen drawers. All you need is a cookie cutter. 
Now that you've made it this far it is time to start to add more colors and textures. 
There is a large amount of colored wool you can add to add color and texture but beyond the colors there are different types of wool. The one I use most often is merino top coat. I use this when making animals, for fur mainly. Another fun one is locks.  Locks are great for hair, and beards or curls for sheep and other animals. 

There is a multitude of top coat varieties. Top coat is straight fibers. It looks more like hair. Some sheep breeds make for nicer fiber to felt with. 

Here is a breakdown of some of the popular fibers for needle felting:

1. Merino Wool
Description: Fine, silky wool with short fibers. Available in a wide range of colors.
Use: Best for surface details, blending, and creating smooth finishes. It's slower to felt due to its fine texture.
Examples: Dyed Merino roving for colorful surface layers.

3. Corriedale Wool
Description: Medium-coarse wool with a balance of softness and firmness.
Use: Versatile, used for both core and surface work. Felts relatively quickly and holds shapes well.
Examples: Dyed Corriedale slivers (thin strands) or batts.

4. Romney Wool
Description: Coarser and springier wool, often used for sculptural felting.
Use: Ideal for creating firm shapes or pieces that require durability, like ornaments.
Examples: Natural and dyed Romney roving.

5. Shetland Wool
Description: A fine but slightly coarse wool, available in natural and dyed shades.
Use: Great for detailed work and creating textured surfaces.

6. Alpaca or Llama Wool
Description: Extremely soft, smooth, and lightweight.
Use: Difficult to needle felt alone but excellent for blending with other wool types for softness and sheen.
7. Wensleydale or Cotswold Wool
Description: Long, lustrous locks with a curly texture.
Use: Best for adding curly details like hair, manes, or textured surfaces.

8. Icelandic Wool
Description: A mix of long and coarse outer fibers with softer inner fibers.
Use: Great for rugged textures or projects with a natural, rustic feel.

9. Silk-Merino Blends
Description: Wool blended with silk for a shiny, luxurious effect.
Use: For intricate surface details or adding luster.

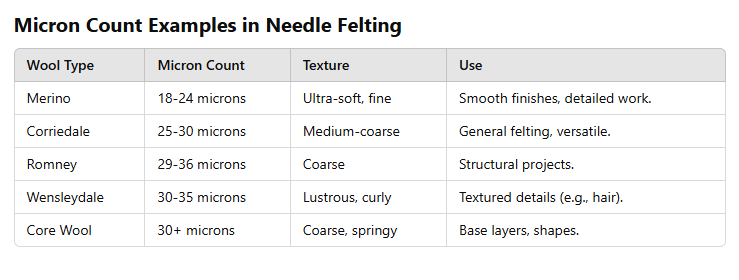
One thing you will hear about is the micron count of fiber :

The micron count refers to the diameter of individual wool fibers, measured in microns (one micron is one-millionth of a meter). It’s a key factor in determining the texture, softness, and best uses of a particular wool type.

Understanding Micron Count

Low Micron Count (Fine Wool):

Fibers are thinner, softer, and more delicate.
Examples: Merino wool (18-24 microns).
Best for: Surface finishing, creating smooth textures, or items worn against the skin.

High Micron Count (Coarse Wool):

Fibers are thicker, coarser, and more durable.
Examples: Core wool or Romney wool (28-35+ microns).
Best for: Structural needle felting, rugs, or sturdy crafts.


Why Micron Count Matters
1. Softness: Lower micron count wools are softer but take longer to felt.
2. Felting Speed: Coarser wool (higher micron count) felts more quickly and is easier for beginners.
3. Durability: Higher micron count wool is more durable for sculptures or items that need resilience.
4. Appearance: Fine wool creates smoother, polished surfaces; coarse wool can add texture or ruggedness.
With all of this knowledge your mind might be buzzing, so I'll stop here. 
If you want to dive even deeper I recommend joining Rustic Fiber Academy. At the academy I make myself fully available for all students to ask questions anytime. You are also given full access to every needle felting tutorial we offer, from beginner tutorials to advanced. Along with all of that you will be given a built in community of needle felters, all learning too.
Of course if you aren't ready to join you can always shop our courses and purchase them individually. 
Write your awesome label here.

Cookie Cutter 

Learn how to utilize cookie cutters to make ornaments.
Write your awesome label here.

Wine Cork Birds

Create, cute little birds with this beginner tutorial. 

Do you have questions or want to learn more?

Feel free to ask me, Christie, and I'll get back to you as soon as possible. 


First Name
Last Name
E-mail address
Your message
Thank you!
Created with