Are you ready to start creating fur for your needle felt creations?
The task of adding fur can seem daunting but it doesn't have to be.
In this article I'll be sharing with you a few ways to easily add fur.
Adding fur to a needle-felted creation can give it a lifelike texture and a greater sense of realism, especially for animals, creatures, or characters that need that extra touch of softness and detail. The process of adding fur to a needle-felted sculpture can be done in a few different ways, depending on the effect you're going for.
The first thing to consider is what kind of texture you want.
Depending on the animal or creature you are creating helps determine the best fiber for the job:
- Long Wool Fibers (like Wensleydale or Teeswater): These work great for adding longer fur or a soft, flowing mane, like on a lion or horse.
- Long Wool Fibers (like Wensleydale or Teeswater): These work great for adding longer fur or a soft, flowing mane, like on a lion or horse.
- Shorter Wool Fibers (like Merino): These are good for adding more fine, dense fur.
- Alpaca or Angora: These fibers create a soft, silky fur effect, perfect for fluffy animals like rabbits or cats.
That being said in general for most of my makes I use merino top coat but it really does depend on the texture I want to achieve.
That being said in general for most of my makes I use merino top coat but it really does depend on the texture I want to achieve.
The next thing to consider is the length of the fur and the size of the animal you are creating.
For a smaller animal with longer fur my go to process is doing what I call fur plugs.
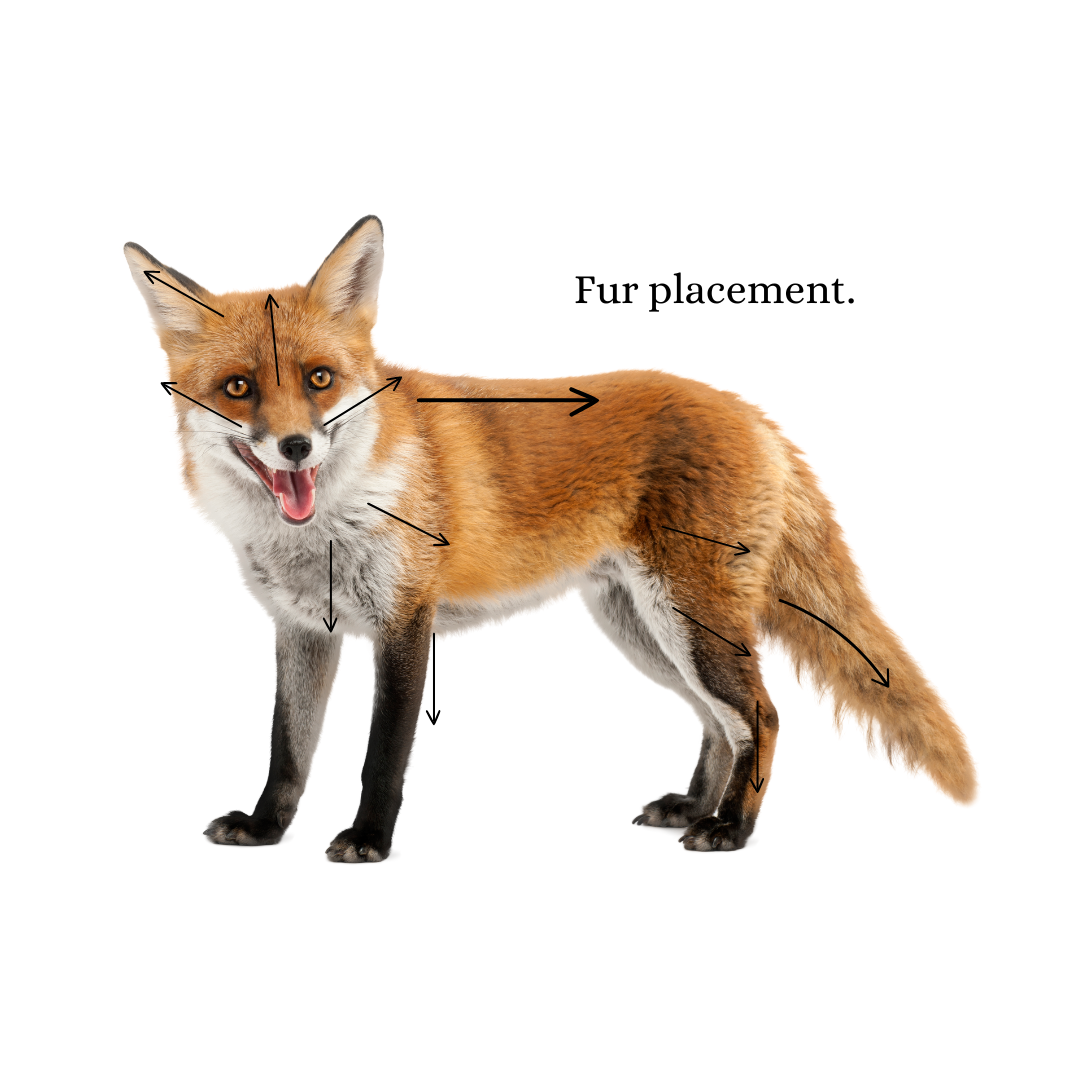
Cut your top coat into 2 inch sections then pull off a small amount and fold it in half. Twist the fold with your fingers slightly. Where the twist is made is where you will felt the wool into your piece. Felt the fur plugs into your piece following the natural way the fur would lay on the animal. Scroll below for a diagram that shows how fur lays on most mammals.
Follow the video for a clearer understanding of how to create fur plugs.
Write your awesome label here.
For adding fur to large animals the process is slightly different.
I use longer sections of wool, cut to approximately 2 1/2 to 3 inches. I do not twist the ends. Follow along in the video to get an idea of the entire process.
Write your awesome label here.
Quick note - In tight sections of larger creations I use the fur plug technique
One of my favorite ways to add fur is perfect for animals with shorter fur.
Write your awesome label here.
Additional Tips for Adding Fur to Needle-Felted Creations:

Created with